


Many people select containers according to the racks and flow racks that they already have on hand—this, in fact, is contrary to lean principles. First determine the ideal material quantity and choose the suitable container size and type to transport the material. Once this is done, designing a Flexpipe gravity flow rack can begin. To make the experience an easier one, read on for relevant information and helpful tips on each of the flow rack’s components.
Estimated reading time: 10 minutes

 5-6h
5-6h

Ready? Let’s begin – it comes down to 10 essential steps.
The design of your flow rack will depend on the size and weight of the container that will be moving on the roller tracks. Keep in mind that containers with a flat bottom will roll more smoothly.
Here are the key aspects to look at when deciding which type of container to use:
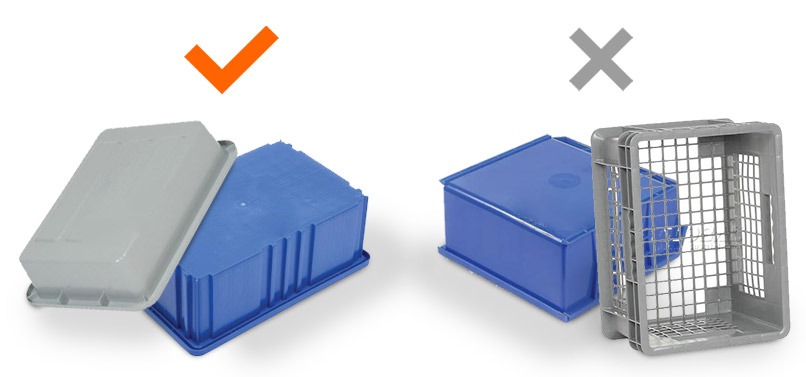
Bear in mind that containers with grooved bottoms may get jammed between the rollers on the roller tracks.
The footprint (i.e., space required) of your flow rack will depend on the rack’s purpose as well as the size of the area available on your plant floor.
If you want to:

This step consists of establishing the length and path of your flow rack from the containers’ starting point to their destination.
First, you must measure the distance that the container will cover between machine A and machine B. The longer the distance between the two, the greater the slope’s incline will have to be. So the container’s starting point will be very high up and its destination, very low. Conveyor racks are often used in a shipping/receiving department where the material is loaded or unloaded onto big conveyor racks.
It goes without saying that the location of machines and workstations already on the plant floor will have a significant influence on the length and path of your flow rack.
With the new processes, the employees will focus mainly on reducing movement and transportation waste throughout the production floor and the warehouse. The team cut movements to a minimum by revamping the production floor’s layout and using custom-made modular gravity carts to meet employees specific needs.

Your flow rack’s fundamental purpose is to supply a workstation. That said, you need to set your Kanban according to your minimum and maximum quantities per container and number of containers. This is mostly done with regard to TAKT Time (Takt is the German word for when an orchestra conductor uses a baton to regulate the music’ tempo). In lean, it’s the rate at which a finished product needs to be completed to meet customer demand.
In production facilities, it’s best to keep only a small lot of materials on hand, i.e., for a few hours of production, and have a material handler (The Water Spider) replenish the flow rack periodically to avoid overstocking the employee’s workstation and keep the production rate flowing efficiently. The supermarket gravity racks should be not too far from the assembly line to increase the efficiency of operations.
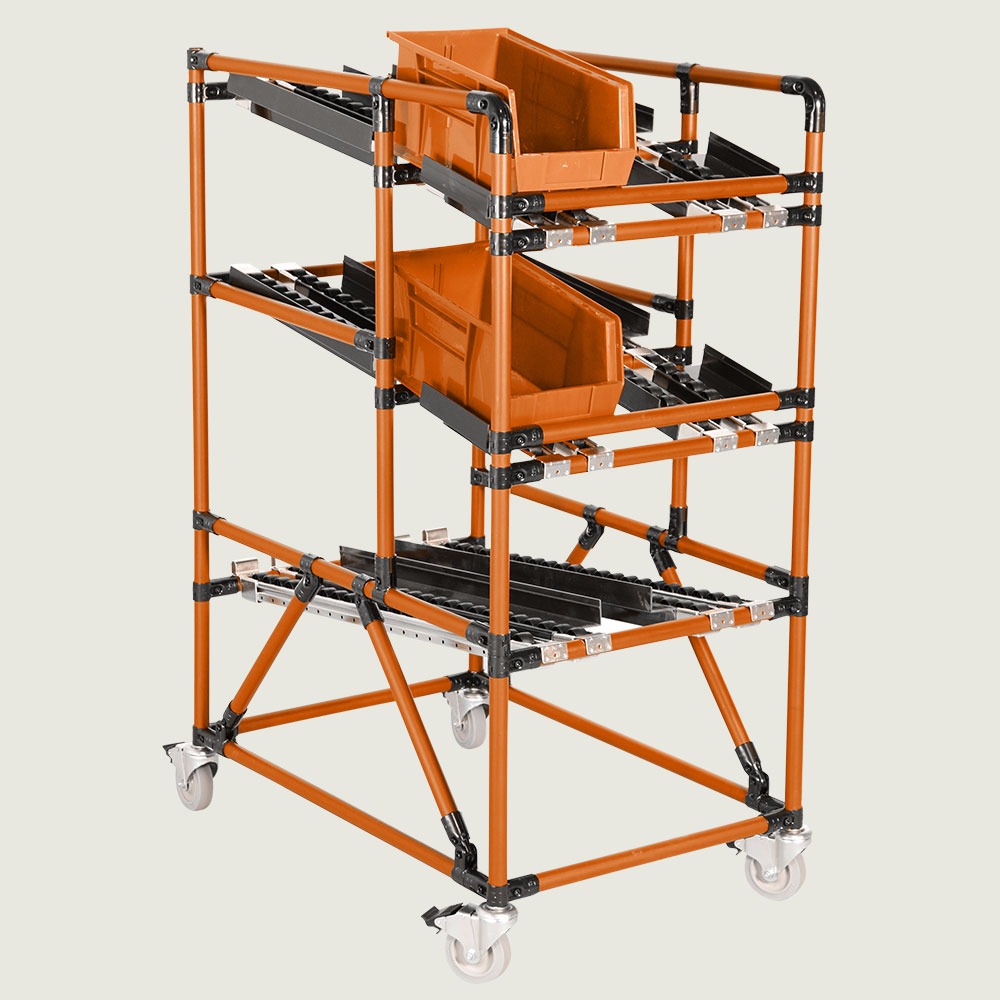
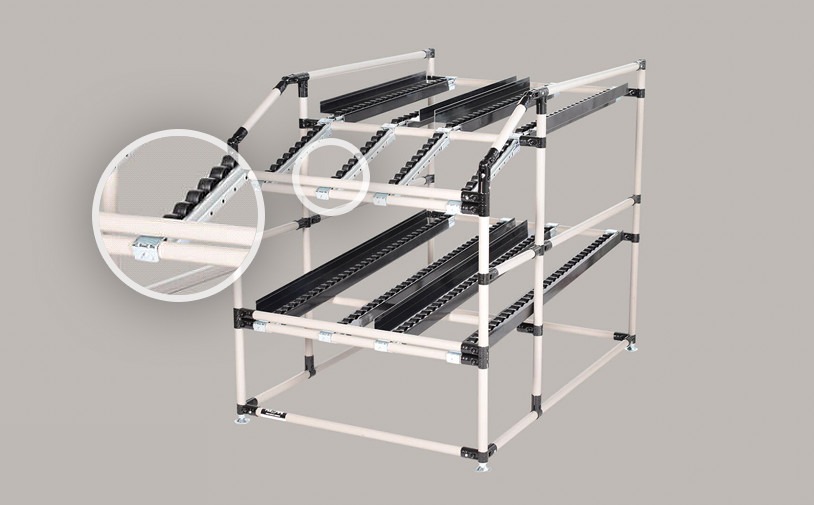
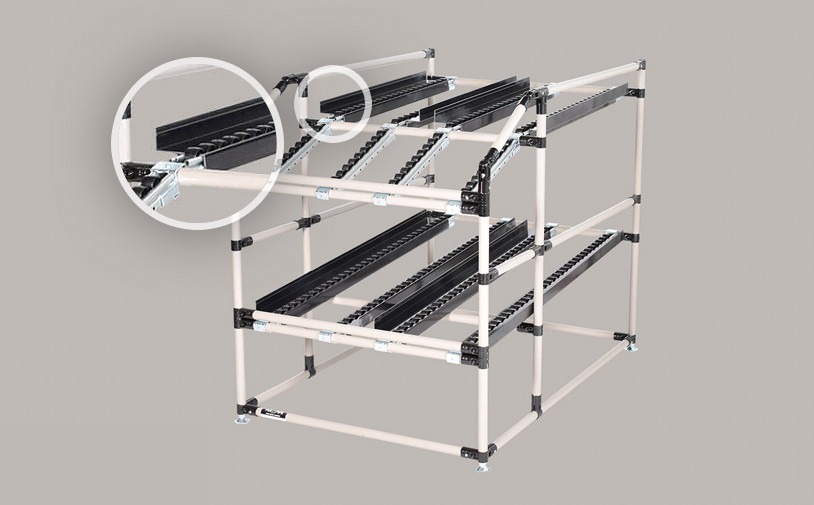
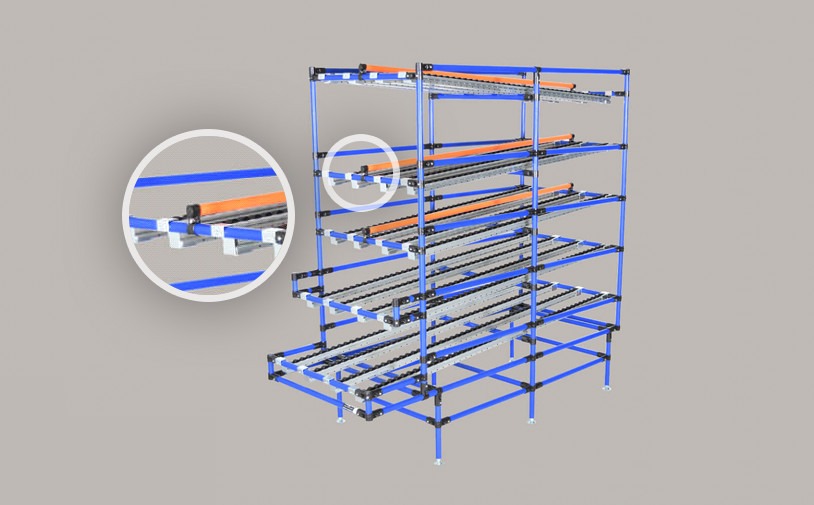
Supermarket gravity racks help realize this approach with a continuous flow in the factory. These can be used on the assembly lines or in the storage areas. The pipe and joint system facilitate the building of these custom supermarket racks.
Depending on your needs, you may opt for top or bottom-level container return. The goal is to ensure optimal container flow. It’s best to keep the levels for empty containers out of the “strike zone” (a body-movement area – between the shoulders and knees – where a worker most efficiently can complete a given task with the least amount of strain).
By adding gravity flowracks to the production area, as well as a system to avoid overstocking and unnecessary movements, operators can now carry out their tasks much more efficiently and in an ergonomic manner.
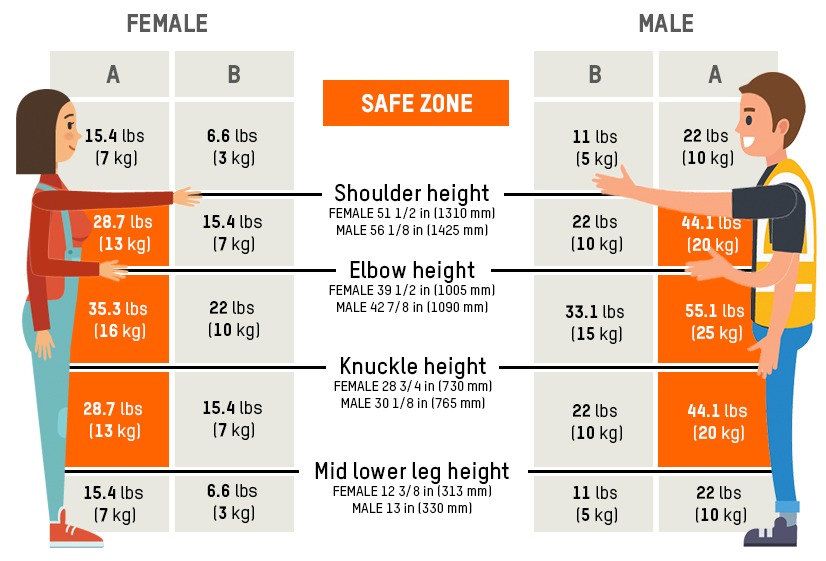
If you need more than 1 level of flow, set up ergonomic landing and loading stations for your containers that range from a minimum of 24 in. up to a maximum of 60 in. The first level will store your raw materials and the second level, the empty containers.
Remember to factor in a 3-in. clearance to load and unload containers for easy picking.
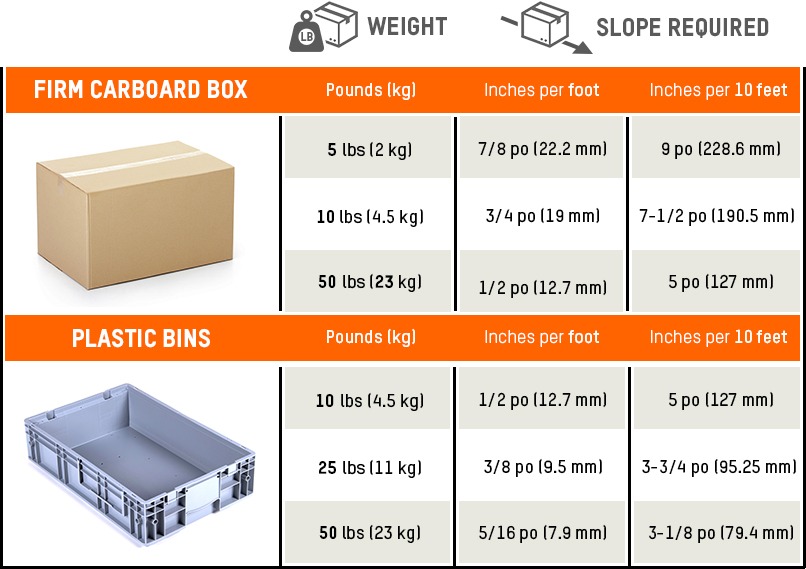
The slope should be 3 degrees, but you might need to adjust it according to the weight of the containers and length of the flow rack.
The following load characteristics will significantly impact the flow of the gravity conveyor: the bottom’s surface, its material, rigidity, and weight.
Take a look at the chart below for broad guidelines to help you determine what the slope should be according to the container’s weight and the distance it will travel.
Before implementing the conveyor system, make sure to test the slope to correct any elements which may cause inferior performance.
There are different options for container stops:

The R40-MS is a metal conveyor mount used at the starting point of rail tracks.
This product serves as an anchor between the conveyor and a perpendicular pipe. To stop a container, add a tube stopper.
Buy this product online:
R40-MS – Metal conveyor mount for conveyor starting point


The R40-TS is a metal conveyor mount with a 1-in. tab stopper.
Buy this product online:
R40-TS – Metal tab stop conveyor mount for conveyor ending point


The R40-DS is a metal mount with a 1 ¼-in. drop stop at the end of conveyor tracks.
We recommend that you use this part when you need to stop heavy containers.
Buy this product online:
R40-DS – Metal drop stop conveyor mount for conveyor ending point


The R40-SLOW is a braking device which prevents the load on the conveyor from crashing into an end-stop device.
Buy this product online:
R40-SLOW – Roller decelerator stainless
There are different options available to separate your containers:

The R40-GUIDE is a black plastic guide for containers. This Flexpipe product is handy for keeping boxes and bins on the rails and for moving on long flow racks or conveyors.
Therefore, the R40-GUIDE is the perfect solution to make sure your containers move in the direction you intended. There is a 2-in. space between the rail and the side of the guide. Remember that this part slides under the roller track.
Buy this product online:
R40-GUIDE – Side plastic box guide for standard conveyor


The R40-CGUIDE is like the R40-GUIDE, but, contrary to the latter, it is placed at the end of the rail instead of on it. Being independent of the rail means you get more flexibility and can leave as much space as you need between the guide and the rail.
Buy this product online:
R40-CGUIDE – Central plastic box guide for standard conveyors

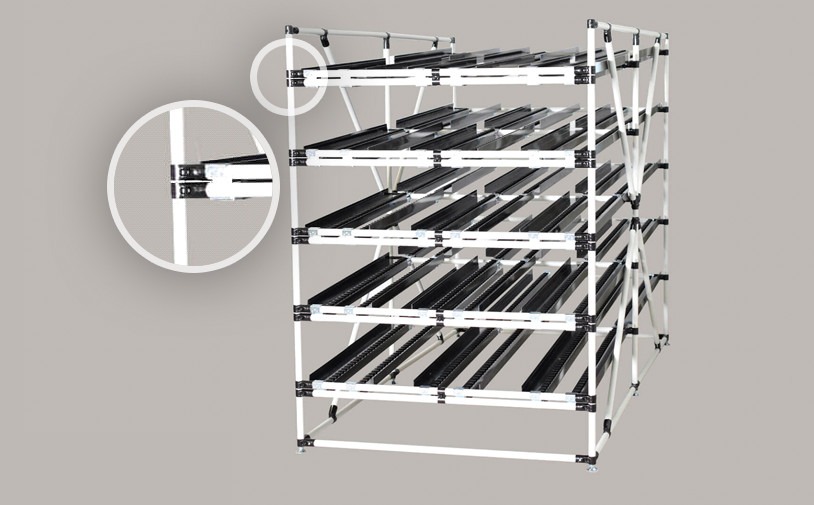
The HJ-7 is a metal connector set that allows you to connect two pipes perpendicularly, one above another.
It’s a low-cost and flexible solution to create corridors.
Buy this product online:
HJ-7 – Metal 90° superimposed joint set


The HJ-1 is a metal tee joint set that allows you to connect two pipes in a T-shape or to create a corner. You can rotate this connector up to 360 degrees before fixing it to make 45- or 90-degree supports.
Buy this product online:
HJ-1 – Metal tee joint set

The HJ-6 is a metal joint set that lets you create a two-pipe intersection with an adjustable angle. This assembly has many applications that range from bracing, hinging, pegging, deportation and more. This part is an attractive option as it gives you a good height of separation which the other options mentioned above cannot offer.
Buy this product online:
HJ-6 – Metal pivoting tee joint set
There are several ways you can increase your flow rack’s capacity:


The R40-TU is a metal conveyor union used to connect two rails that are cut and interrupted by a perpendicular pipe. This product lets you keep a straight line. You would otherwise need to use two R40-MS side by side. However, this is not always ideal if you have two rails close to each other.
Buy this product online:
R40-TU – Metal conveyor union for standard rails

Such as using an R40-CS to reinforce it.
How to build flow racks in 8 steps
So as you can see, each of the 10 aspects listed above has an important role to play in ensuring that your flow rack moves the containers as efficiently as possible. If one of the elements is not a perfect fit for your needs, it will negatively impact your flow rack – and your employees’ –performance.
Ready to build your flow rack? Order the parts online.
Need a second opinion about the design?
Send your sketch to your project manager for validation. He will follow up with you to finalize it.

Make sure the heaviest containers are located not on the highest or lowest levels but in the ergonomic strike zone.