


We have gathered 5 assembly tips for better gravity flow rack system regarding containers, ergonomics, recommended slopes and more. There are some unwritten rules to follow for fully efficient modular flow racks.
Estimated reading time: 10 minutes
 3-4h
3-4h
Read on to find out our best tips, and don’t forget to download the PDF version for collecting them all!
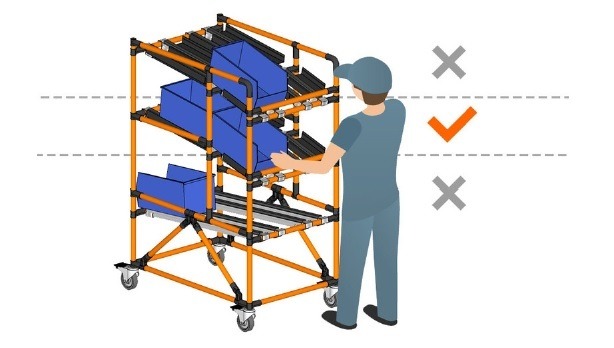
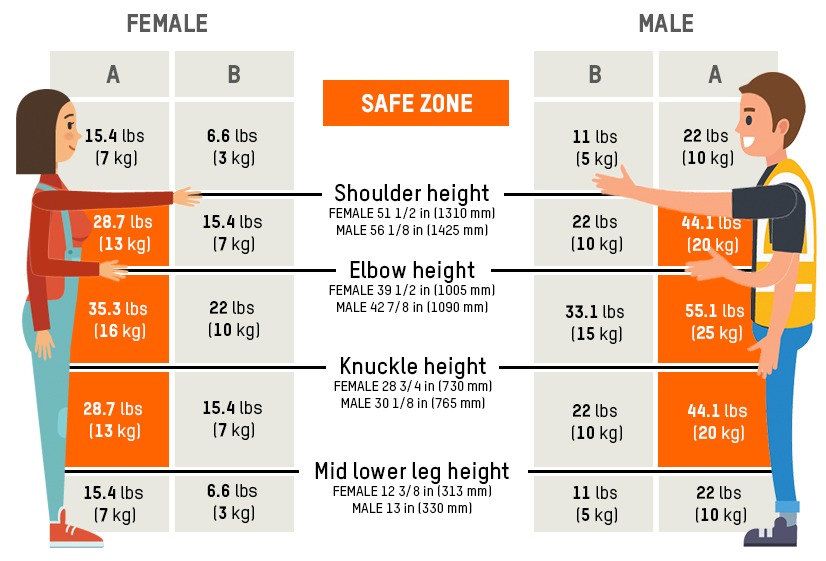
In order to facilitate handling, make sure the heaviest containers are not on the highest or lowest level, but in the ergonomic zone.
The height of the levels should always vary from a minimum of 24 in. up to a maximum of 60 in.
The first level will store your raw materials and the second level, the empty containers.
Remember to factor in a 3 in. clearance to load and unload containers for easy picking.
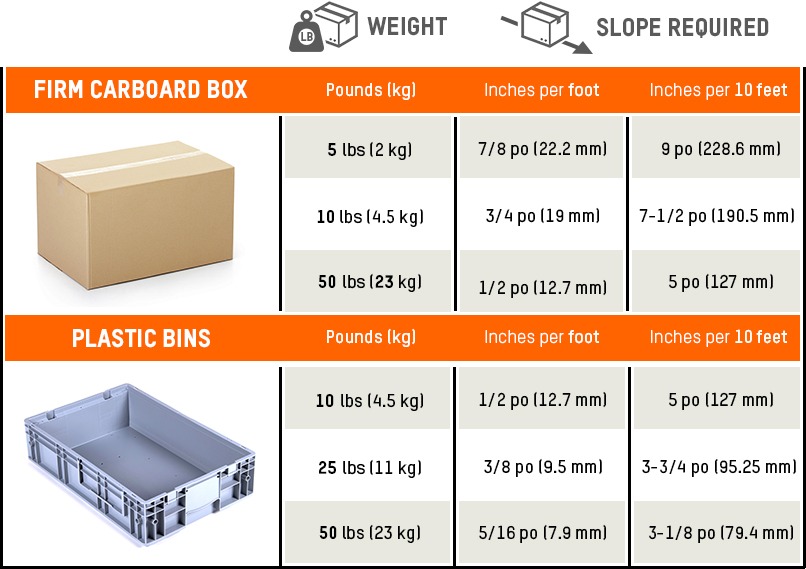
Take a look at the chart above for broad guidelines to help you determine what the slope should be according to the container’s weight and the distance it will travel.
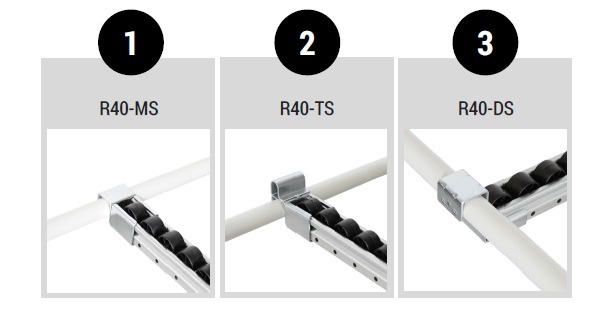
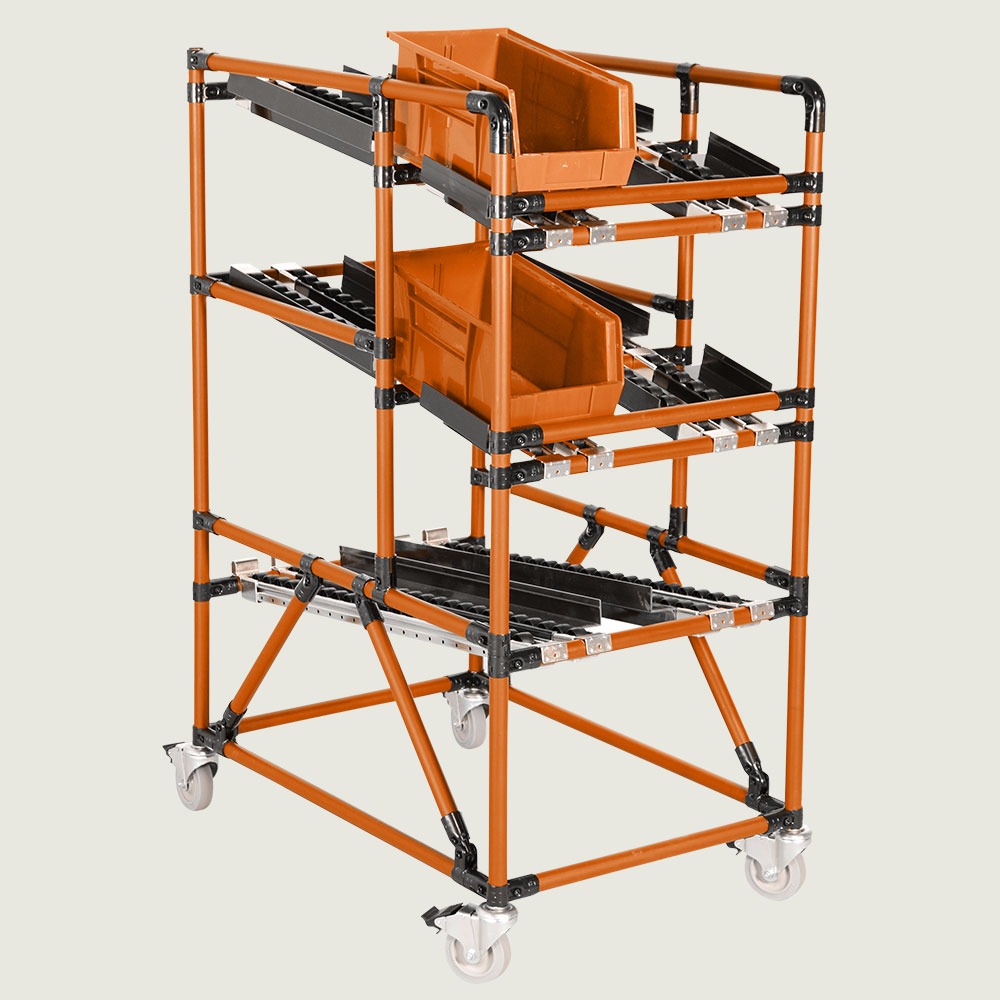
There are 3 different options for containers stops:
R40-MS: This product serves as an anchor between the conveyor and a perpendicular pipe. To stop a container, add a tube stopper.
R40-TS: This product is a metal conveyor mount with a 1 in. tab stopper.
R40-DS: This product is a metal mount with 1 1/4 in. drop stop at the end of conveyor tracks.
We recommend that you use this part when you need to stop heavy containers.
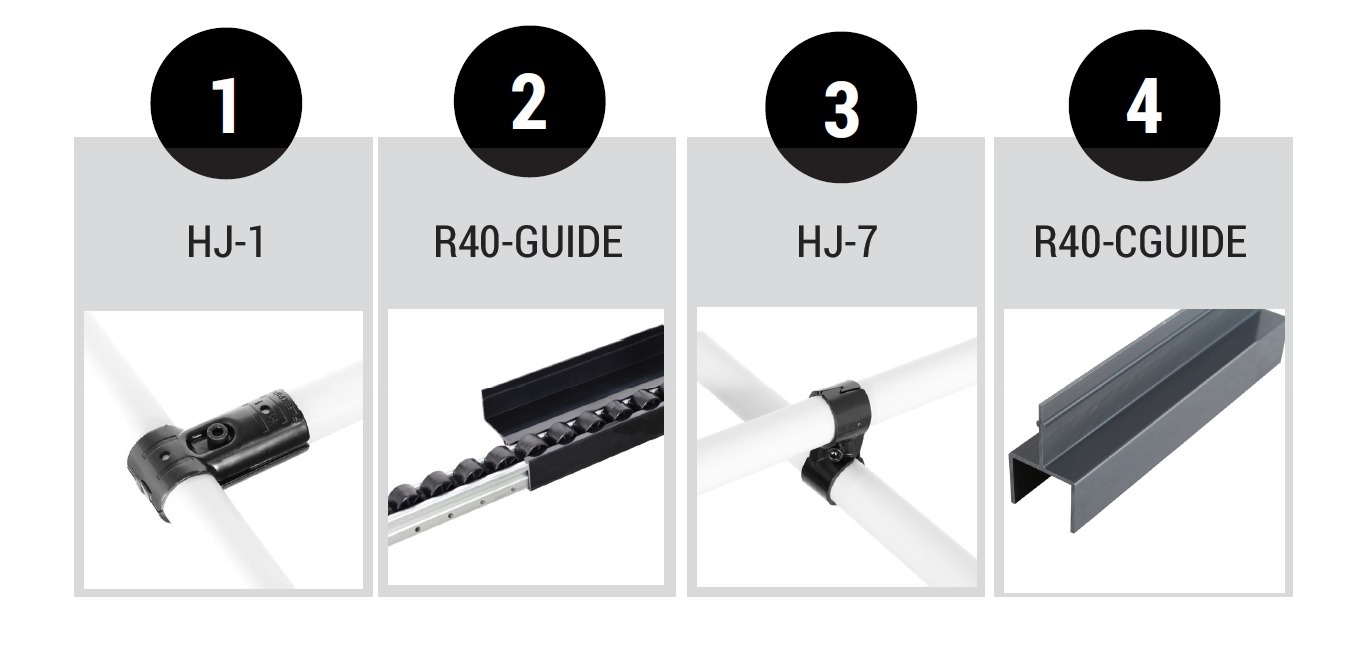
There are 4 different options available to separate your containers:
HJ-1: You can rotate this connector up to 360 degrees before fixing it to make 45 or 90 degree supports.
R40-GUIDE: This product is handy for keeping boxes and bins on the rails and for moving on long gravity racks or conveyors.
HJ-7: This connector allows you to connect two pipes perpendicularly, one above another. It’s a low-cost and flexible solution to create corridors.
R40-CGUIDE: This guide allows you to leave as much space as you want between the guide and rail.